The "Kevlar®* Sock"
Of the three most commonly used composites, cloth made with Kevlar®* fibers is the strongest and hardest to work with. (Kevlar® is the trade-marked name of DuPont's para-aramid fiber product.) Fiberglass is strong, cheap and simple, carbon fiber is rigid, expensive and somewhat tricky, and cloth made with Kevlar® is very strong, expensive and difficult. The problems I've had are that it's hard to cut, the fabric is so thick that it tends to buckle when bagging (carbon fiber has this problem too) and it's almost impossible to sand.
You can imagine how excited I was when Ed Shihadeh of Giant Leap Rocketry told me he was considering offering a new product which would make reinforcements with Kevlar® easy to use. The "Kevlar® Sock" is a 100% Kevlar® fiber woven tube. It's thinner and more stretchy than the tubular aramid sold for recovery systems (shock cord). The sock tube has a nominal diameter of about 2½" and can be used to reinforce body tubes from 3.0" up to 6". Because the fabric is in a tubular shape, you only need to cut it to length and a clean cut isn't critical (it won't show). Also, there is no seam running along the length of the body tube. Because the sock is stretchy, it hugs the body tube tightly. This makes vacuum bagging optional and if you do bag, reduces the wrinkling.
Because this product is new, we had to come up with techniques for using it. This page describes a sample lamination of two tubes using the techniques Pius Morozumi and I came up with and lessons I learned while trying it.
What Length?
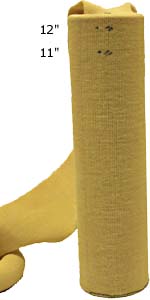
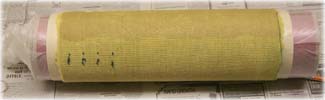
The first thing which became obvious after playing with the stuff, was that the sock got shorter as it increased in diameter. This means that the larger a tube you use it on, the more unstretched length you will need. For this test, I laminated a 3.0" and 3.9" diameter tube 12 inches long to see how the stuff worked. As you can see from the pictures below, the 3" tube requires at least an extra inch and the 3.9" tube requires an extra 3".
 |
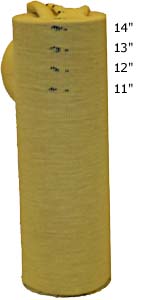 |
| 3.0" tube (note almost 13" of sock used) | 3.9" tube (note 14½" of sock used) |
So, when your order your own sock, order 13½ inches per foot for 3.0" tubing or 15 in/ft for 3.9" tubing. You'd also be wise to add 2" to the total for safety and for overlap at both ends. Of course, Giant Leap will probably sell this by the foot, so you'll be rounding up anyway.
Laying Up the Sock
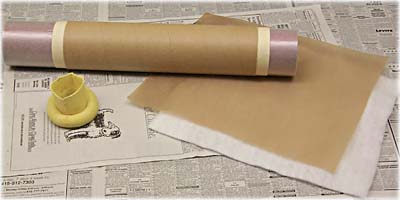
I prepared my tube as usual. Here you can see the tube prepared for vacuum bagging (motor cases make good mandrels):
Why is the sock rolled up? The sock can't be wet out like flat cloth because of the tube shape and because it wouldn't go over the tube well when saturated with epoxy. I wanted to make sure the sock was fully wet out and Pius and I were afraid that just applying epoxy from the outside wouldn't saturate the tube and wanted to paint epoxy on the tube. However, then the sock won't slip over the tube.
The solution was to paint the tube with epoxy, then roll the sock down like a condom. This way, there's no need to stretch or slide the sock against the surface with epoxy. To make sure there was enough epoxy, I then dabbed it onto the outer surface of the tube. I wanted to make sure that the cloth was saturated and there wasn't enough on the tube itself to do so.
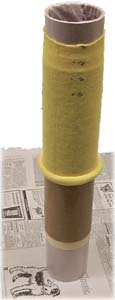 |
Left: rolling the sock down the tube painted with epoxy
(3.0" tube shown).
Below: dabbing extra epoxy into the sock once it's been unrolled (3.9" tube shown). |
|
 |
Important! A last step before bagging is to dab off the excess epoxy. You should always do this anyway, but dabbing epoxy onto the tube after the sock has been applied means you have more excess than usual. The best technique is to use wadded-up toilet paper to soak up the excess epoxy on the surface. (I didn't do this and my breather got totally saturated with epoxy, leaving me with some wrinkles.)
For more information on vacuum bagging, see my Kitchen vacuum bagging article.
We subsequently tried it with a 6" tube and it worked, although we had to use a piece twice as long as the tube to cover it. Also, we had to use a nose cone to stretch the sock down onto the tube. The condom roll doesn't work well because the roll is too tight to unroll on a 6" tube. But, we were able to bunch it up in the middle and then do each half separately. Everything else was done as described above.
Finishing Up
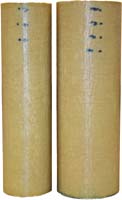
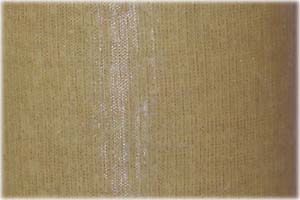
Once the sock layup had partially cured, I de-bagged the parts and applied the veil layer. (For these samples, I used 4oz. fiberglass cloth as the veil.) Below you can see the results of my first attempts (the two sample tubes) with the veil applied and the ends trimmed. And there's no seam running along the tube! On the right you can see a closeup of the surface showing the sock weave pattern on the 3.9" tube.
 |
 |
So now Giant Leap Rocketry's new "Kevlar® Sock" provides an easy and reliable way to laminate your tubes with reinforcements made from Kevlar®.
A Sock Tip
Charles Barnett had this great tip:
Of course, in all subsequent projects, applying a decent sanding veil prevented problem. But, on my first reinforcement project, I fought the fuzzies battle. What started with a couple of fuzzies became a real problem which was finally conquered with "super glue."
By applying superglue to the fuzzy surface and allowing it to dry, it can be cut flat with a razor. A subsequent coating of medium superglue leaves a surface which can be smoothed and finished without fuzzing up.
* KEVLAR® is a trademark of E.I. du Pont de Nemours and Company.