Arreaux Upscale
In late 1999, a group of investors (myself included) purchased AeroTech in order to release unwilling shareholders, clean up debt, and bring new capital and new blood to the company. AeroTech is an excellent company, still run by founder Gary Rosenfeld.
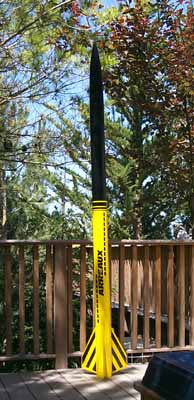
What better way to celebrate this event than by building a rocket? I decided to upscale the canonical AeroTech rocket, the Arreaux. My Arreaux will be a 3.9" minimum diameter rocket to accommodate AeroTech's largest motor: the N2000.

My big Arreaux would, of course, look like the kit rocket. Using a 3.9" body tube (4" O.D.) gives a scale of 213% which will mean a overall length of 92".
The Pictures
|

|
ROC-stock XI
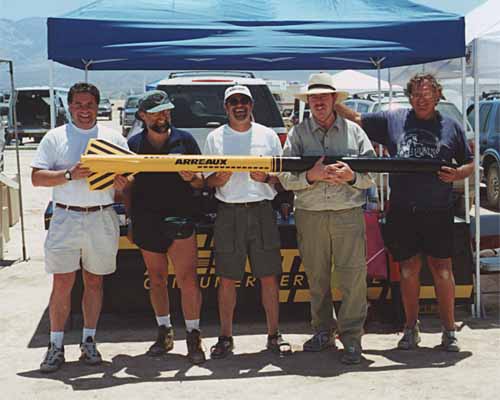
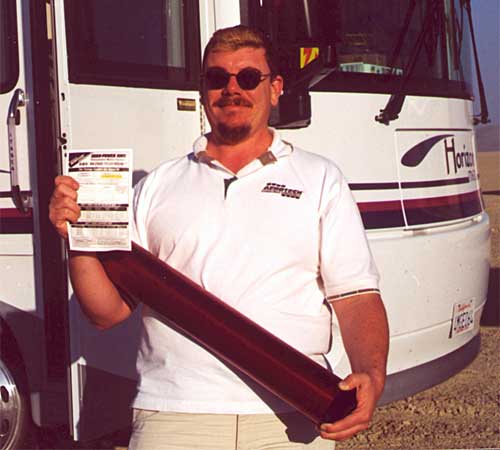
Below is a picture taken at ROC-stock on June 10, 2000 with the four owners of AeroTech (Mike Reiner, Ken Biba, Gary Rosenfeld, and yours truly) and Frank Kosdon. (This was right after the announcement that AeroTech would license the Kosdon name and motor designs to produce the Kosdon line of motors.)
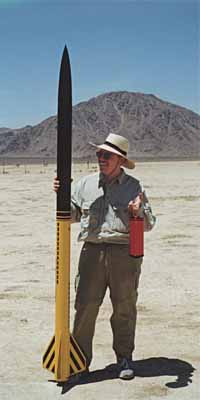 To the right you can see me holding the Arreaux and the loaded AeroTech K650.
This is the 98mm "coffee can K" and looks pretty silly.
I call this the "where's the beef" shot as it looks pretty short for a 98mm motor!
The Arreaux weighs only 12 pounds dry so this motor made for a beautiful slow flight,
but only in windless conditions.
To the right you can see me holding the Arreaux and the loaded AeroTech K650.
This is the 98mm "coffee can K" and looks pretty silly.
I call this the "where's the beef" shot as it looks pretty short for a 98mm motor!
The Arreaux weighs only 12 pounds dry so this motor made for a beautiful slow flight,
but only in windless conditions.
Mornings at Lucerne Dry Lake were windless, but the wind came up in the late afternoon. After visiting with people on Friday and Saturday, I got down to business on Sunday morning and launched the Arreaux and my OTRAG. I had actually planned to launch the Arreaux on Saturday, but the wind came up by the time I'd gotten it ready to fly so I launched it first thing on Sunday morning.
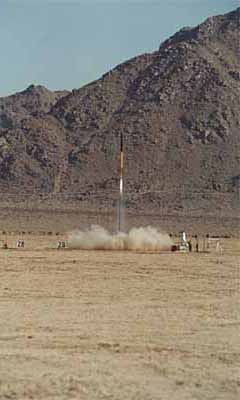
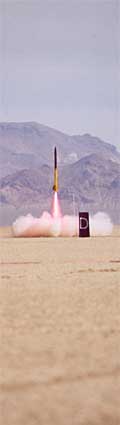
Bright and early (about 8:15am) on Sunday, the Arreaux finally flew. As you can see in the pictures below, the windless conditions made for a beautiful flight on this motor. This really is a cool motor for the right rocket!
 |
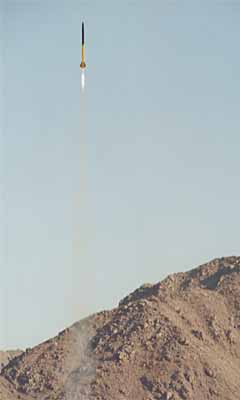 |
Dual blacksky ALTACC altimeters were used for dual-deployment recovery (in parallel). One unit reported 6602 feet and the other reported 6664 feet, for an average of 6633 feet. It was a gentle flight with a maximum velocity of 682 ft/sec and a maximum acceleration of 6.9 G.
Mudrock 7.0
I had planned to make the second flight of the Arreaux be on an N2000. But, after shredding the OTRAG, I decided to fly it on an L952 instead. This is a very nice two-grain white lightning 98mm motor. So, the first flight was on a single grain 98mm motor, the second on a two-grain motor. I guess the next flight will have to be on an M1419...
 |
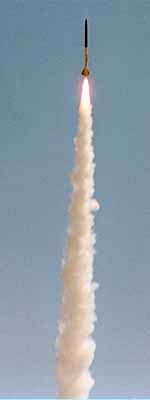 |
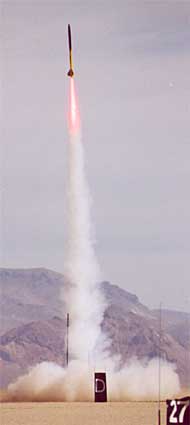
The Big Arreaux made a beautiful and majestic flight to about almost 14,900 feet on the big L motor. Very nice and a close and almost scratchless recovery!
Black Rock XII
The next step in the sequence was a three-grain 98mm motor to be launched at the AERO-PAC Black Rock XII launch on September 10, 2000. Despite urgings to fly it on the blue thunder M2400, I decided to stick with the original plan and fly it on the gentler white lightning M1419.
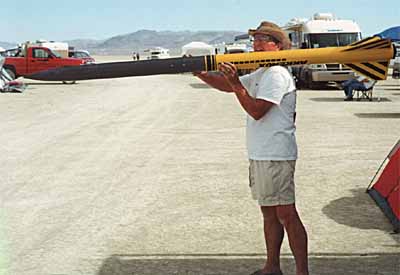
For this launch, I had my friends Rodney and Sam visiting (to find out what this rocketry stuff was I kept talking about). Below you can see Rodney carrying the Big Arreaux out to the launch pad for its third flight. Thanks Rodney!
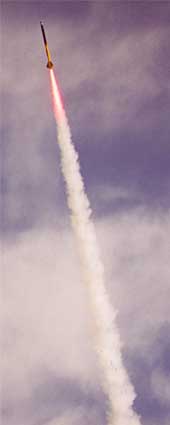
 On this flight, the Big Arreaux made a beautiful straight flight
in gusty winds to 20,600 feet.
Truly the white lightning motors are a sight to see and I doubt I would have
gotten anywhere near this altitude with the faster-burning blue thunder motor.
The 7 second burn of the M1419 is really cool.
On this flight, the Big Arreaux made a beautiful straight flight
in gusty winds to 20,600 feet.
Truly the white lightning motors are a sight to see and I doubt I would have
gotten anywhere near this altitude with the faster-burning blue thunder motor.
The 7 second burn of the M1419 is really cool.
We lost sight of the rocket before apogee and it took a long time to come down, and it landed about four miles from the launch site (almost to the Eastern edge of the playa). But, of course, Sue managed to track it with the trusty Walston radio direction finder and Chet was able to drive his Jeep right up to it and pick it up. Thanks Sue and Chet!
Recovery was a bit rough and the rocket got dragged about a hundred feet along the playa by its parachute before we could recover it. The fins need reinforcement and the paint needs to be touched up before flying on the M1939 (and then, finally, the N2000).
Mudroc 2001
The rebuilt Arreaux was ready just in time to fly at Mudroc 2001 on the fourth weekend of June 2001. The plan was to continue the sequence of white lightning motors by flying it on the M1939, but the failure to fly the Redline M2000 in the Nike-Asp left that motor available for the maiden flight of the rebuilt Arreaux.
The larger Redline motors had just been certified a week earlier and it turned out that my flight was the first certified flight of any of the larger Redline motors. In the picture above, I'm actually holding the instructions for the reload. The Redline are here! (Photo by Sue McMurray.) Here are some specs on the the M2000 motor (taken from an AeroTech firing):
| burn time: | 4.7s | |
| average thrust: | 1971N (443.01#) | |
| maximum thrust: | 2326N (523.00#) | |
| total impulse: | 9262Ns (2082.15#s) | |
| percent of class: | 81% M |
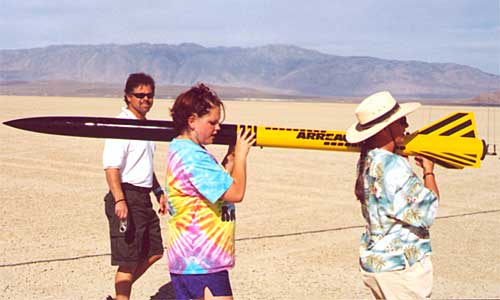
In the photo above, first Cara Rosenfield and I are carrying the Arreaux to the pad on Saturday morning. Then, I got lazy and let Sue McMurray take over for me. Gary and I just walked along and let the girls do the work.
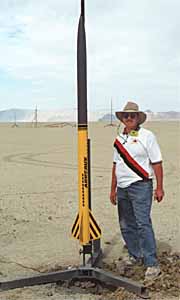
We loaded the rocket onto a club rail without much trouble and took the obligatory dumb rocket picture:
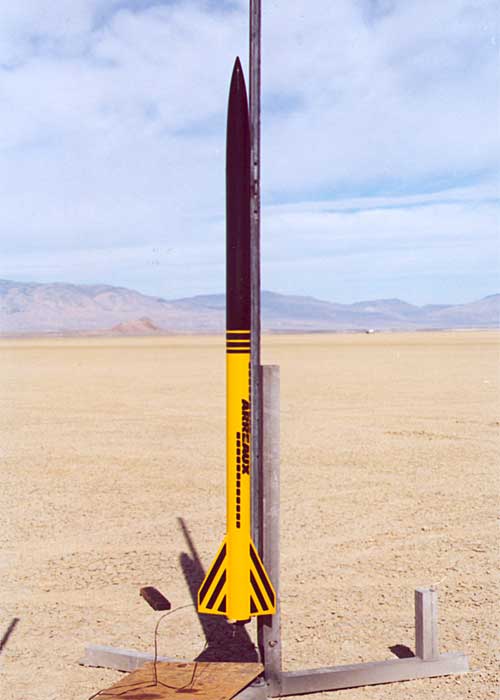
Then, back to the flight line for the launch.
Gary made a short speech about this motor and the newly-certified Redlines
in general.
5... 4... 3... 2... 1... launch!
 |
 |
 |
The flight was perfect and the M2000 Redline was a beautiful brilliant red. By the time we launched (around 9:00am) there was some wind so in the third picture you can see the rocket arcing a bit into the wind.
Despite the weathercocking, the rocket flew to about 24,600 feet.
(One ALTACC reported 24,968 and the other reported 24,257.)
I had accidentally set the M altitude record!
Sue was tracking the flight by eye and with a Walston tracker. We lost sight of it shortly after burnout, but she had it with the tracker. I walked back to put away my camera and someone told me "it's down; I heard it!" That's never a good sign.
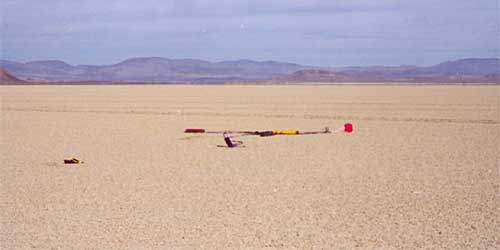
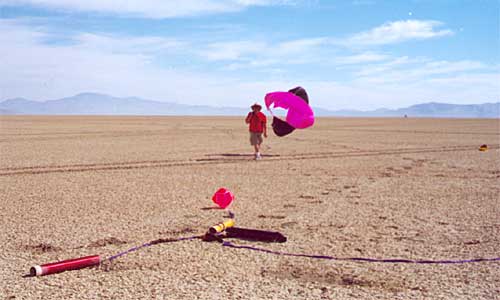
Sue and I drove out in the direction the rocket had come down. When we got there, it looked OK from a distance as you can see in the picture above. However, the landing had been very hard as we found when we got closer. The motor had kicked out the back (the drogue recovery was anchored to the forward closure), the fin can was broken and the airframe had zippered in three places.
The main 'chute also blew out a panel and opened a D-ring on the bridle and come off as you can see in the picture below. It seemed that the drogue had been fouled when the apogee ejection charge had kicked the motor case to the aft. This cause the rocket to fall very fast and create a too-violent main deployment. The main parachute blew out a panel and became detached from the bridle and the rocket free-fell to the ground.
That was a sad end to a spectacular flight. My newly rebuilt Arreaux had been trashed on landing. However, this was still a historic flight as it was the first with the production big Redline M and had set an altitude record.
The Design
This rocket will be a simple dual-deployment rocket. The main thing I am trying here is using all fiberglass parts. The body tube will be fiberglass tubing now available from Giant Leap Rocketry (the same stuff sold by Hawk Mountain). This means a super strong airframe without the need to do any reinforcing myself.
See the airframe drawing (PDF). Note that the rocket turned about to be about 93" long instead of the ideal 92", but just you and I know about that.
I also wanted the fins to match the AeroTech kit fins, which have a nice bevel along the edges. Of course my fins would be made out of G-10 fiberglass so to make bevels to match, I came up with a jig. See my Fin Beveling technique.
Since this is a minimum-diameter rocket, attaching the fins is critical. The normal through-the-wall technique with 6 fillets per fin cannot be used so the outside fillets must have enough strength. I had Giant Leap slot the tubes and the fins fit into the slots, but just through the tube. This means that epoxy can be put inside the fin slots, to give some additional reinforcement.
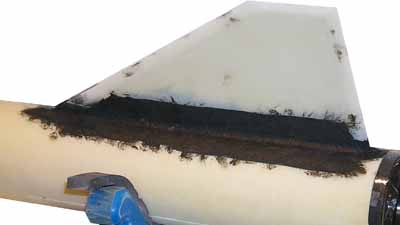
The fin was bonded into its slot using epoxy thickened with chopped Kevlar®* fibers and a small fillet was made on either side of the fin. Then carbon tissue was saturated in unthickened epoxy and laid over this small fillet. In the photo above, you can see the carbon tissue applied over the fillet on the first fin. At the aft end, you can see the motor casing, covered with Teflon sheet, to prevent the fin from falling through into the tube.
The black is the epoxy. I used high temperature epoxy, purchased from Shadow Composites since these joints are critical and subject to heat from the motor. This black epoxy is much more resistant to temperature than most, up to 500°F. For example, West System epoxy breaks down at 120°-130°F depending on which hardener and filler are used. (For reference, a motor may reach up to 200° at the outside of the casing by Tripoli Motor Testing certification rules.)
Once the initial fillet and reinforcement were applied to all three fins, a second large fillet was poured using unthickened epoxy. This fillet added more strength, covered the carbon tissue and provided a larger fillet for aerodynamic purposes. Unless there is something wrong with this epoxy, these fins are not going to come off! (This is the first time I've used it.)

Above you can see the parts for the electronics bay. It's nice to work with all-fiberglass parts! Note that the bay doesn't have a separate wall, but is just a section of the forward body tube. The forward bulkhead is locked in place with the coupler segments and the aft bulkhead, which is removable, bolts against a third coupler segment. (All three coupler segments are epoxied in with the same epoxy as used on the fins.) Note the ¼" all-thread and forged eye bolts to carry the recovery forces.
The Rebuild
On the third flight (on an M1419), a rough landing cracked two of the fins at the root. I wanted to keep going on the sequence, but decided that it needed better fin reinforcement to fly on the M1939 and larger motors. (Also, it would need a larger main parachute.)
I decided to rebuild the booster section, but keep the payload and nose cone as-is. The booster section was again built from fiberglass tubing and G-10 fins, but instead of .125" G-10 unreinforced, I used .091" G-10 with tip-to-tip carbon fiber reinforcement.
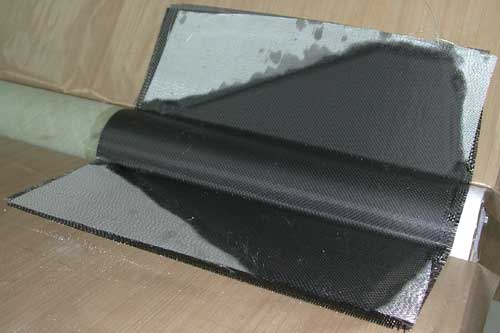
Two layers of 5.7oz. carbon fiber and one layer of 4oz. fiberglass were laminated in each fin bay (three in total), which gave the fins much increased stiffness as well as creating a much stronger, one piece, fin unit. To do this, I used my tip-to-tip reinforcement jig.
Once the three reinforcements were done, the fins had incredible strength and stiffness and I fully expect them to survive the M1939 and N2000 flights.
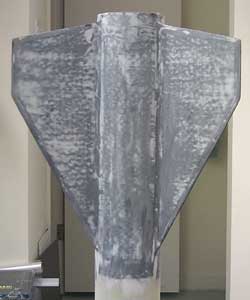
On the right you can see the fin can area after the tip-to-tip reinforcement has been applied and finished. Each fin bay was done, one at a time, and trimmed to match the G-10 fin core. After all three were on and fully cured, the entire area was sanded smooth and the forward end of the fin can feathered down to the tube. (The reinforcement went all the way to the aft end of the rocket.)
Then, I painted epoxy thickened with a light-weight filler (West Systems "fairing filler") over all the surfaces. This filled in the pinholes in the fiberglass and any other imperfections. It is also very easy to sand once cured and sanding leaves a smooth and hard surface. (The goal is to sand most of it off again, except where it is filling in fiberglass weave or low spots).
In addition to rebuilding the booster, I decided to repaint the payload and nose cone. When I originally built this rocket, I was painting my rockets with spray cans. Now, I am using automotive paints for most things. I was able to take the old Krylon paint off easily. It basically wiped off with acetone!
The paint came right off, but the primer didn't. (I don't remember if I used Krylon or Kilz primer on this rocket originally.) I then re-primed over the existing primer and touched up as necessary. After that, it was a simple matter to sand down and paint the parts with PPG DBU colors.
Since it was completely new, the booster required finishing and painting from scratch.
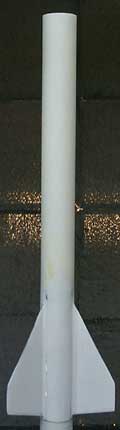 primed & sanded |
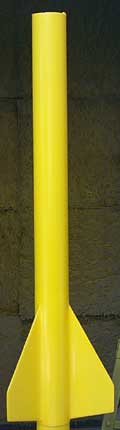 yellow color coat |
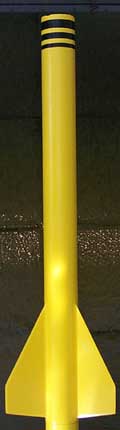 black color coat |
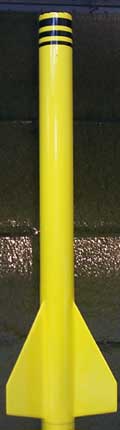 clear coat |
In the sequence above you can see the major operations to paint a rocket with automotive paints. I used the PPG "DBU" products which use separate base and clear coats. This allows you to do multiple base colors and then cover them all with a clear. Also, the separate clear gives a deeper and harder finish than a one-part system.
 First of all, the rocket needs to be primed and any imperfections filled with spot putty.
This is the most time consuming step as the care taken here controls the quality of
the eventual finish.
(You can always do one more prime/fill/sand iteration.)
First of all, the rocket needs to be primed and any imperfections filled with spot putty.
This is the most time consuming step as the care taken here controls the quality of
the eventual finish.
(You can always do one more prime/fill/sand iteration.)
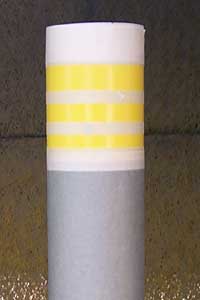
Next, the lightest base color is applied. (In this case it most of the booster airframe is yellow.)
Then other base coat colors are applied once the base coat has partially cured. (To the right you can see the masking for the three black stripes.)
Finally, the clear coat is painted on. There are two or three re-coats per step and the whole process has to be complete within 24 hours. (I did it during most of June 17, the Sunday before Mudroc 2001.)
This is definitely much more work than Krylon spray cans, but the finish makes the extra work worth it!
* KEVLAR® is a trademark of E.I. du Pont de Nemours and Company.