Al Gorilla
At my first Black Rock desert launch, BALLS 98, Paul Robinson (then of Kosdon East, now of Animal Motor Works) was very friendly and helpful. In fact, he was one of the few people who would even talk to me because I had made the mistake of buying a motor from Mike Gillette (i.e., Jerry Irvine) to fly in my Big Kahuna.
I was pretty new to rocketry at the time and he had some cool stuff. One of the things which caught my eye was an all-aluminum rocket he had made and I bought one from him. What with various difficulties with licensing and starting Animal Motor Works, Paul wasn't able to deliver my rocket until late August 2001. But, that was still just in time for BALLS 2001. And then BALLS 2001 was canceled in the aftermath of the September 11 tragedy so the rocket was launched for the first time at BALLS 2002.
I originally ordered the rocket with one load, a green propellant, named Green Gorilla, which is where this rocket gets its name.
The Pictures
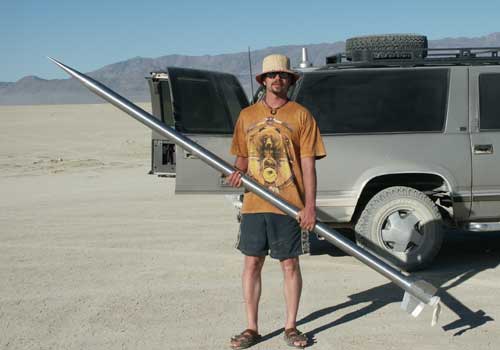
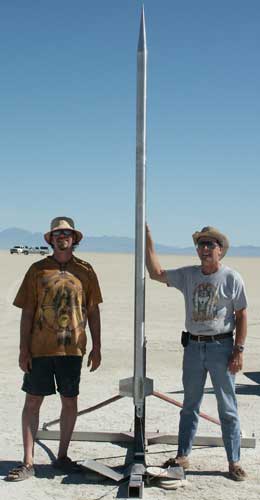
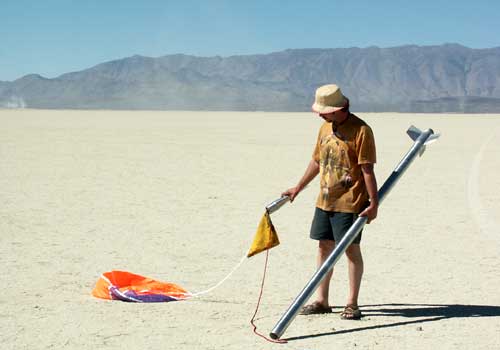
In the picture above, my brother Phillip is holding the Al Gorilla rocket, ready for its first flight at BALLS 2002.
BALLS 2002
My brother Phillip and my friend Rodney came with me to the BALLS 2002 launch and we had a great weekend. Neither of them are rocketeers, but they had a great time out at Black Rock Desert and enjoyed helping me prepare and launch the Al Gorilla and the Nike-Asp in 2-stage configuration (with the baby Nike booster).
|
||
|
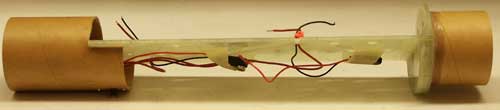
This was my first flight of the Al Gorilla, and my first flight of an Animal Motor Works
motor.
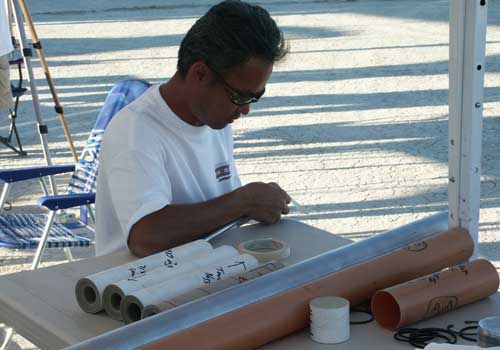
Ken Mizoi showed me how to build the motor
(or rather, he built the motor for me).
In the picture above, you can see the parts of the motor all laid out: the four long grains and the two-piece liner. The aft section of the rocket is the motor case and you can see it laying across the table as well. In this shot, Ken is preparing to abrade the inside of the top three grains to make sure they light easily. Each grain of this motor has a specific order and orientation to make this formulation work in such a long thin configuration. Unlike the standard Animal Motor Works motors, the Al Gorilla uses a forward closure that is threaded. One end acts as the forward closure, threading into the forward end of the motor tube and the other end is threaded for the electronics bay. On the right, you can see Ken sliding the motor tube down onto the liner. (All the grains have already been inserted into the liner.) |
|
|
The plan was to fly the Al Gorilla first thing Saturday morning. Once Ken had built the motor for me, it was just a matter of preparing the recovery system. Of course, a dual deployment recovery system in a 3" minimum diameter rocket is not so easy to design or prep!
Once I had gotten everything packed on Friday evening, I was sceptical that the main parachute would ever come out. There was just too little room and things were packed too tight. However, the drogue would definitely come out and it was a Rocketman 6' 'chute so it would be sufficient.
 |
 |
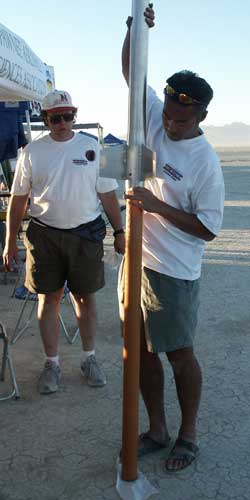
Instead of the usual "dumb rocket photo," you get two! On the left is me in the standard pose and on the right are my brother Phillip and friend Rodney.
 |
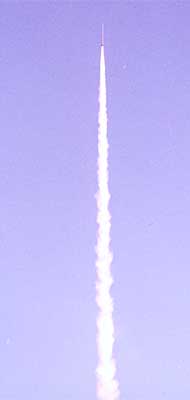 |
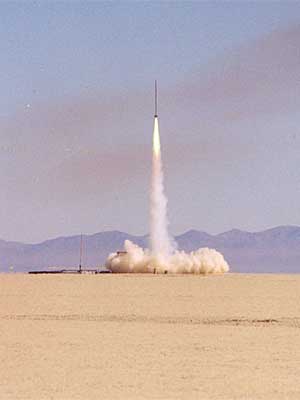
The entire weekend was perfect, with very little wind. As you can see in the photos above, the rocket went very straight into the clear, windless sky. (The motor has a green flame, which was very visible in person, but did not come out well in the pictures.)
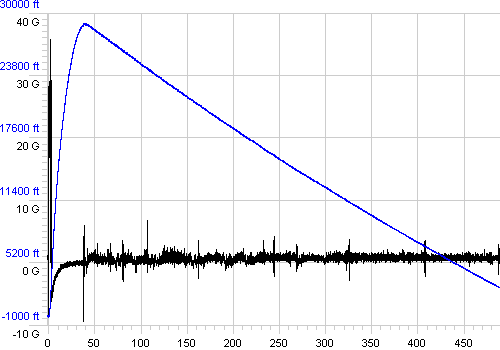
The rocket flew to 28,857' according to the G-Wiz LC Deluxe. Above you can see the R-DAS flight graph, which also confirms that altitude. Note the slow descent, even on the drogue only, which took longer than the R-DAS memory lasted!
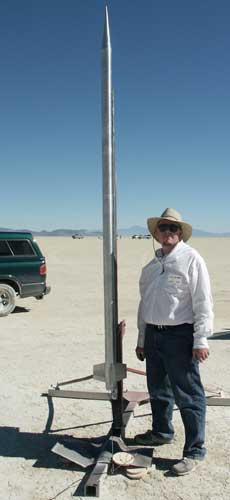
Everything came back safely, even with just the 6' drogue parachute emerging. Above you can see Phillip picking up the rocket to examine it. In the future, I may fly this rocket with just a single 7' parachute, or else try dual deployment with two 3' 'chutes.
The Kit
This rocket is hardly even a kit. It's almost ready-to-fly, except that the recovery system needs to be designed for it. All the pieces thread together, except for the nose cone which slides into the recovery bay for deployment. The parts are nicely machined and the rocket is quite well built (except that the welding on the fin can is a bit sloppy).
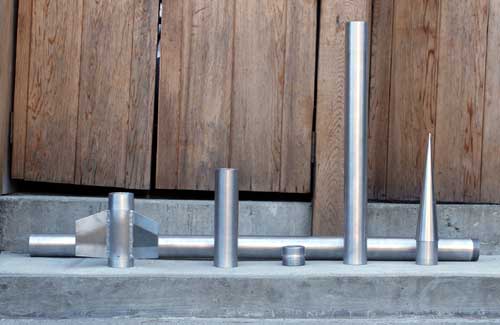
In the picture above, you can see the airframe sections as received from Paul. (The long section along the back is the 56" motor mount tube, then from left to right: fin can, electronics bay, coupler, recovery bay and nose cone.) There's not much work to do on the airframe itself! However, the recovery system is another story.
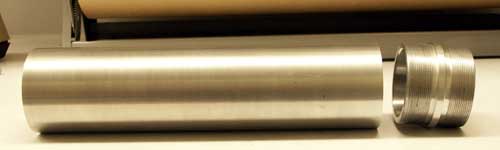
Here you can see the electronics bay (12" long) with the threaded coupler which attaches it to the recovery airframe section. (The tube has 10" of usable electronics space and only a 2¾" inside diameter.)
 |
 |
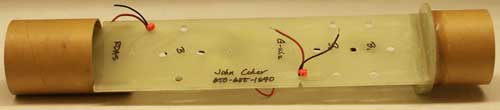
And here is my electronics mounting board, front and back (side). Since both ends of the electronics bay screw into the electronics bay airframe, the mounting of the board needs to accommodate the wells at both ends, and mount to the bay airframe tube itself (not the ends) so that the switch remains accessible through the hole in the tube. The electronics board holds a G-Wiz LC Deluxe with its two batteries and an AED R-DAS Kompact with its battery.
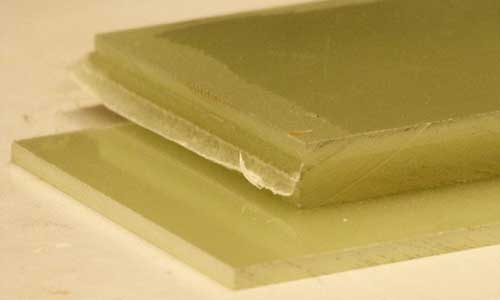
Note how on the right (forward) end of the electronics mounting board I have added two G-10 half circles to make a ring the full size of the electronics bay I.D. This is to keep the board centered in the bay and to provide a way to screw the board to the bay airframe. The half circle on the back is much thicker, actually three layers of 0.125" G-10. I laminated three layers of G-10 together with 4oz. fiberglass between then and made a nice solid thick block that I can drill and tap for the retaining screws. In the picture above, you can see a single piece of G-10 and the lamination on top of it.
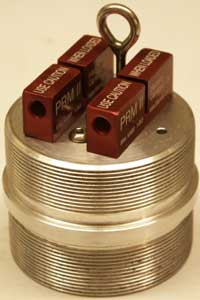
I wanted to build in dual-deployment, but the way the rocket is designed, there is only a single break (at the nose cone). The I.D. of the recovery airframe is so small (2¾") that it makes any method tricky, but there is just enough room for dual blacksky PRM IIs. See the recovery system drawing for the details.
The main problem is that there isn't room for large enough parachutes. I decided to use Rocketman R4C (4') parachutes for both drogue and main parachutes. One comes out at apogee and the second one comes as the main, making a dual parachute recovery. This will bring the rocket down quickly, but safely.
Note how the dual PRM IIs are used in the picture on the left. A custom link was designed to allow redundancy. The link connects the two PRM units so that if either one releases, the second parachute will be freed. See the key drawing for details. (This system went through several revisions, which is why there are some extra holes in the top. However, the holes outside the ones for the PRM are for the electric matches from the electronics bay.)
| The rocket is pretty heavy for its size, with a dry weight of 18# (without recovery system or motor). The aluminum tubing has a wall thickness of about .130", which is quite thick and makes for a heavy rocket. Hopefully the extra strength will pay off in surviving hard landings due to the tiny parachutes which fit into the recovery section. |
|