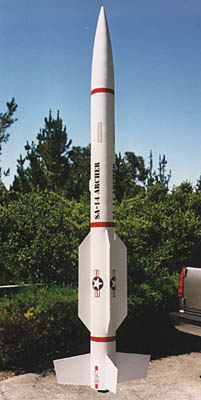
SA-14 Archer
I wanted to try out Public Enemy's rocket kits after I got their catalog at a ROC launch. I like sport-scale rockets so I ordered the Honest John and the SA-14 Archer kits. Public Enemy makes larger versions of both rockets, but I wanted the smaller ones so I could launch them at LUNAR ("H" motor maximum). Both kits use 38mm motor mounts.
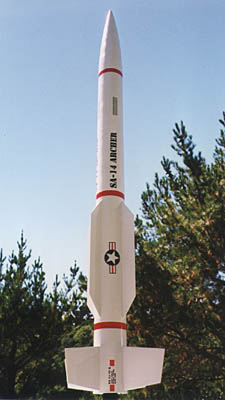
I had a hard time finding any information on this rocket for a scale paint job. I ended up copying the paint job from other rocket kits, so it's colorful but I can't claim accuracy. I later found out, this isn't a real rocket, but was designed by Estes for the North Coast kit. The decals are all homemade on an ALPS MD-1000 and the three red bands are painted.
The Pictures
The Kit
The kits were pretty standard high-power rocket kits. Public Enemy kits show evidence of more manual labor than other companies' kits and more attention to detail. The instructions are minimalist, but there isn't anything unusual about these kits. If you've built several other high-power kits, you'll have no problem. The instructions are a single page with no photographs and one overall diagram.
One feature of this kit I liked was the way the fin unit could be finished outside of the body tube. The centering rings are epoxied to the motor mount and just placed into the body tube. Then the fins are epoxied to the motor mount tube, but not to the body tube. The fin unit is then slid back out of the body tube. (The fin slots go all the way to the aft end of the body tube.) Now the fins can be filleted to the motor mount tube and centering rings without trying to reach inside the 3" body tube! (See the picture of my Honest John in progress.)
The kit requires nose weight to fly safely on heavier motors (due to the strakes). In order to accomplish this, I had to weight the nose cone. The first attempt to epoxy shot into the forward tip of the nose cone failed during transportation when the epoxy/shot lump came loose. My second attempt was to fill the rest of the nose cone with expanding foam.
To do this, I purchased the two-part STEPANFOAM (RI-9625). This product, unlike the aerosol can spray foam, is supposed to harden properly in sealed areas. I got my foam with no instructions, but a e-mail to Stepan (they have a nice web site) got me a return call from their tech support. The support representative told me that the product mixes 60/40 by weight (60% part A, the "polymeric isocyanate", to 40% of the "fluorocarbon blown polyol"). I weighed both parts and they are very close (35g per fl. oz.), so I mixed them by volume.
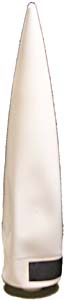
The stuff needs to be handled quickly as you only have about 5 seconds to stir before it starts to foam up. It reaches the "gel" stage in 80 seconds (according to Stepan). As they recommended, I tried to increase the density of the resulting foam by covering the opening in the aft of the nose cone with duct tape after pouring in the foam and punching a few pin holes. The stuff bubbled up nicely through the pinholes and I thought I had the perfect solution. I then painted the nose cone and left for work.
When I came back home to check on the nose cone, a strange thing had happened. The nose cone became deformed (see picture on the right). It looked like a vacuum had developed and sucked the nose cone into a strange shape. I drilled a hole in the side of the nose cone, but of course by this time the foam had hardened and the cone didn't return to shape. Perhaps the heat of the foam curing warped the ACE nosecone. At any rate, this nosecone was a loss.